
Difficulty
Moderate
Steps
5
Time Required

User-Contributed Guide
This guide is not managed by the site's staff.
Quiz
0
Tools
Parts
-
-
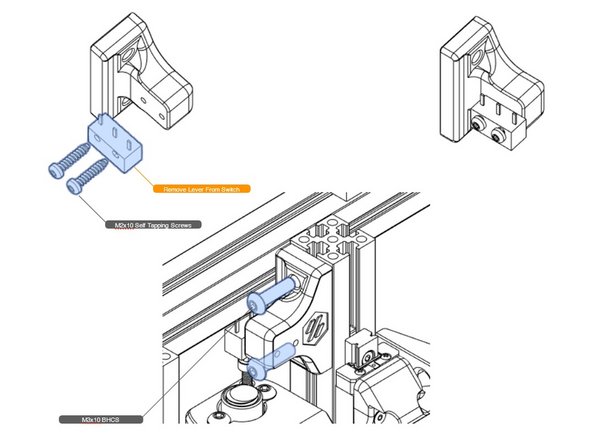
Self tapping screws are used to attach the Y and Z endstop microswitches.
-
It is easier to make the solder connections prior to installing the switches. You can roll up and tape the wires to keep them out of the way for the rest of the build.
-
Not shown in the illustration is the contact lever arm. It points up when attached.
-
-
-
An M3 screw is used as the Z endstop trigger, and can be used for minor adjustments.
-
-
-
Attach a pre-wired switch to the Z endstop block as shown using self-tapping screws.
-
Attach the block to the vertical extrusion. Adding the nuts to the screws before insertion is helpful. Check that the trigger post and switch line up properly.
-
-
-
Attach idlers as shown. Note the order of the bearing and washer parts.
-
Don't worry about snugging the bolts up yet, you'll find it useful to loosen them when we do the belts.
-


Cancel: I did not complete this guide.
3 other people completed this guide.