
Difficulty
Moderate
Steps
5
Time Required

User-Contributed Guide
This guide is not managed by the site's staff.
Quiz
0
-
-
The belt retention clamp was printed with in-model support shown in blue in the illustration. With needle nose pliers, remove this plastic.
-
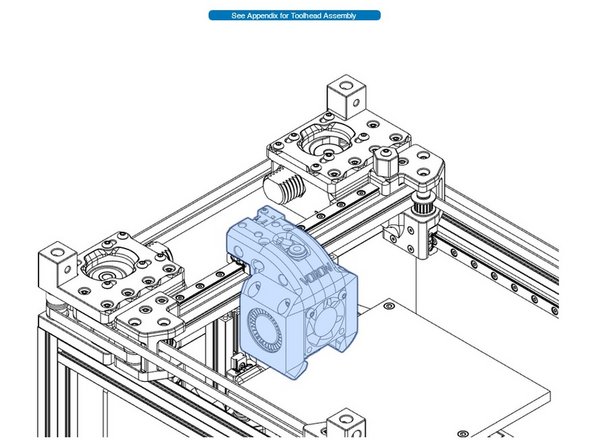
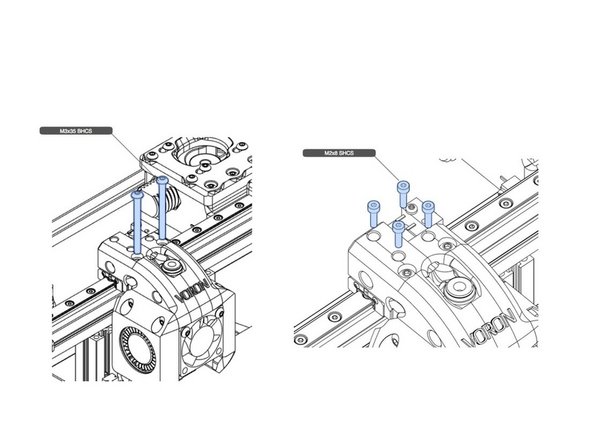
Before proceeding further, study this step, and next step to understand how the toolhead, belt clamp, and X linear rail fasten together. These parts become one connected unit when assembled.
-
The nuts in the first illustration of this step receive the bolts in the second illustration of the next step.
-
-
-
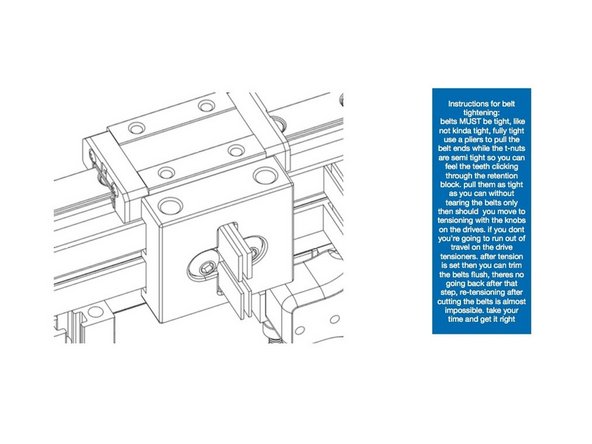
In the this step, read all of the instructions before beginning. Once completed, the belts can only be adjusted by the tensioning knobs. If you run out of knob travel, you will have to re-do the belts. Get it right NOW. Properly tensioned belts will ensure proper operation later.
-
To emphasize, the belts MUST be fully tightened in order for the Core XY movement to work smoothly. In Core XY, motors operated with each other, and in opposition to each other. For this to work, the belts have to be tight enough to eliminate backlash when motors change directions.
-
Ensure the tensioning knobs are loosened.
-
To start, set one end of each belt flush with the retention block on one side, and tighten down the belt clamp, securely. Pull the other end of each belt taught, and partial screw down the clamp so that you can feel the belt teeth clicking as you pull.
-
Using a pair of needle nose pliers, pull each belt as tight as you can without tearing the belt. Since there is one clamp securing two belts, use the pliers across both belts and twist the pliers to affect tightening. Tighten the clamp securely, then adjust the tensioning knobs.
-
Note, if you feel you need some slack in the belts to further pull in a tooth, or two, you can remove a motor while doing so.
-
Finally trim the two belt ends flush with the retention block.
-
Additional belt tension is done with the tensioning knobs, now, and as a maintenance task, later.
-
-
-
After assembling the toolhead and belt clamp to the linear rail, ensure that the toolhead moves smoothly along the X axis. Note that the motion will be stiff because the belts are attached to the motors, but the motion should still be non-binding.
-


Cancel: I did not complete this guide.
2 other people completed this guide.