
Difficulty
Moderate
Steps
8
Time Required

User-Contributed Guide
This guide is not managed by the site's staff.
Quiz
0
-
-
The Y rail carts should already be in place, because it was mentioned never to remove them, but if they were removed for cleaning, put them back on now.
-
-
-
The assembly of the X axis linear rail is the same procedure as previous rail assemblies. The illustration should look familiar.
-
Once rail is attach, tape the ends, or use the plastic stops, to prevent the cart from sliding off.
-
-
-
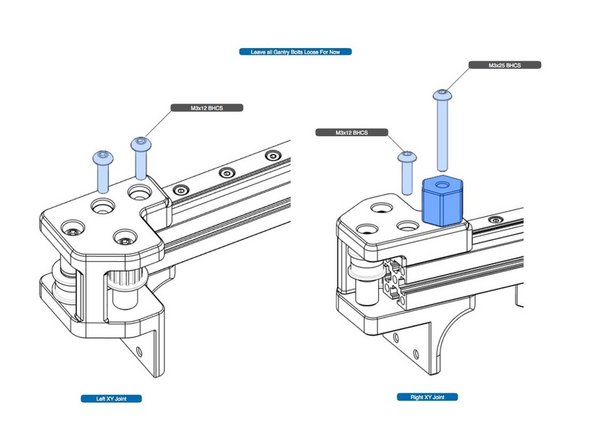
In this step there is a lot of detailed assembly work. First, gather all the parts required, and at a table, lay out each part in the order it will go in the assembly. Take the time to study the diagram for a few minutes before starting the assembly.
-
Going slow, assemble the Joints. Note, one of the fasteners is a self-tapping screw driven into plastic. Tighten slowly, good and tight, but avoid stripping out the plastic.
-
The two M3 nuts that receive M3x25 screws for holding the stack together can be nylon insert locking nuts. This will allow you to tighten the stack "just right" to avoid binding, yet the screws will still be secure in the nuts. Note, you may find that the screw doesn't reach the nylon part of the nut, in which case, you'll have to use standard nuts
-
When complete, check your work carefully.
-
NOTE: Assembling these pulley stacks wrong will create issues in printing, and may be difficult to diagnose. Double check your work.
-
-
-
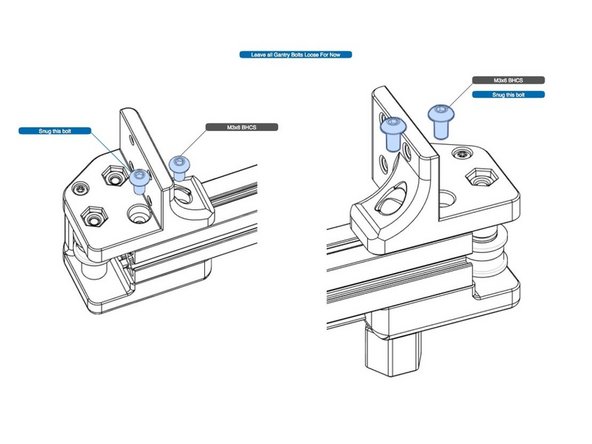
Install the joint onto the X cross beam, as shown, with linear rail facing up.
-
Snug the bolts indicated, but final tightened will be done during alignment in a later step.
-
-
-
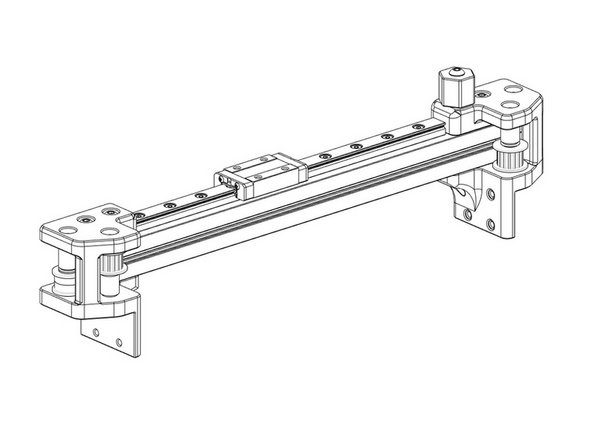
Fully assembled, the X axis is now a gantry.
-
Before proceeding, check that all moving parts are indeed moving, and smoothly.
-
-
-
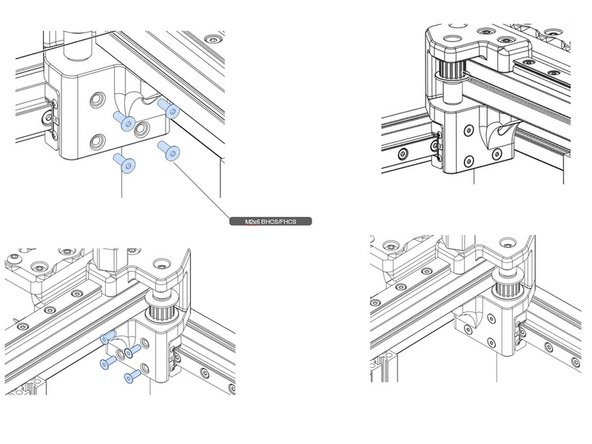
Place the gantry to lineup with the Y linear rail carts, and install the screws. Either flat head, or button head screws, will work.
-
-
-
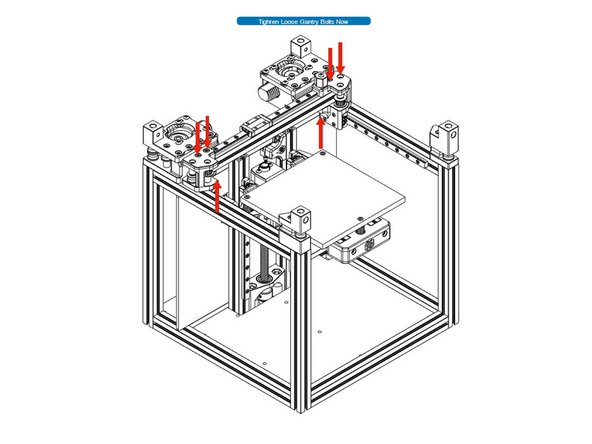
Check that the gantry moves without binding, and slowly tighten the joint screws that were left un-tightened previously, including snugged ones. Check gantry movement as you tighten.
-
When all screws are tight in the joints, check one last time for smooth gantry movement.
-


Cancel: I did not complete this guide.
4 other people completed this guide.