
Difficulty
Moderate
Steps
5
Time Required

User-Contributed Guide
This guide is not managed by the site's staff.
Quiz
0
Tools
-
-
The instruction set that follows is one way to mount the bed, that being the method shown in the Manual. But, you can mount the bed another way, if you like.
-
The Manual's method is counterbores with the screws going down through the bed and bed support beams into thumb nuts.
-
NOTE: As an alternative to using nuts to lock in the bed screws, the bed holes can be drilled undersize and tapped.
-
The second method (not illustrated) is to drill and tap 3 holes in the bed and mount it with screws coming up through the bed support beams and threading into the bed plate. IMPORTANT: Make sure later when leveling the bed that the screws do not poke through on the top surface of the bed.
-
In both methods, the spring tension in the bed springs holds bed leveling adjustments in place.
-
-
-
In the drilling of the bed mounting holes, use a center punch to mark the holes, and a drill press, if you have one; otherwise, a steady hand is required in this drilling operation.
-
Drill 3mm holes through the bed, as shown. After this initial drilling, counterbores are drilled on what will be the top surface of the bed. The counterbores are wide enough and deep enough for the M3 screw head to be just below the surface of the bed.
-
After drilling and counterboring the holes, you may want to add a heater to the bottom of the bed, or a special build surface to the top. See the separate Voron Bed and Build Surface Guide for details on making these additions.
-
An additional optional extra is a screw hole for mounting the thermal fuse to the bottom of the plate. If you want that, this is a good time to drill it.
-
-
-
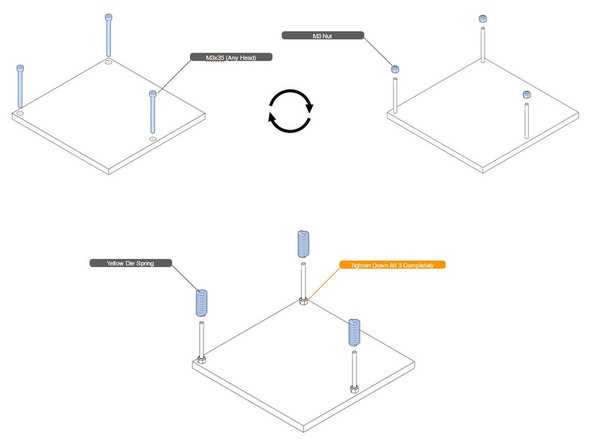
Insert the screws into the counterbore (top) side of the aluminum bed. Make sure the screw heads are slightly below the surface of the bed.
-
Turn the bed over to the bottom side and install nuts with thread locking compound. Tighten securely.
-
Add the yellow springs.
-
-
-
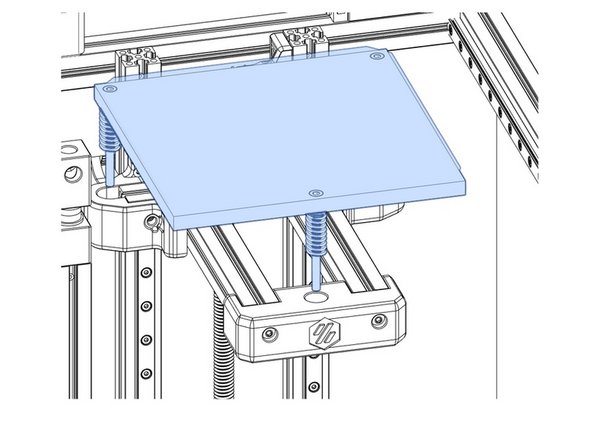
The bed is placed on the bed carrier as shown, being careful not to lose the springs (or put the springs in the bed frame and lower the bed onto them).
-
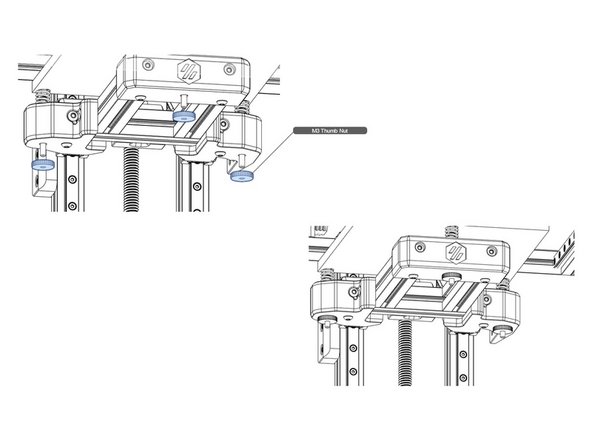
Add the three M3 thumb nuts, and tighten until the springs are partially compressed, so that nuts won't spin off during the rest of the build.
-

Cancel: I did not complete this guide.
3 other people completed this guide.